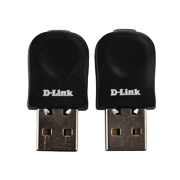
This is how to configure a wireless VCM II unit using the supplied D-Link wireless adapter shown as below:

This configuration allows the computer’s internal wireless card to connect to the internet while the supplied D-Link USB wireless adapter, installed in the computer, communicates with the VCM II.
INSTRUCTIONS: FIRST TIME CONNECTING WIRELESS TO THE VCM II (DEFAULT) (POINT TO POINT)
1.Shutdown the IDS application.
2.Disconnect the VCM II USB cable from both the computer and VCM II.
3.Insert the supplied D-Link wireless adapter into an unused computer USB port.
A Windows “Pop-up” may appear if the device driver is being installed.
4.Connect the VCM II to the vehicle using the DLC cable.
The VCM II’s wireless feature is enabled when connected to the vehicles 16-Pin DLC connector. It may take up to 30 sec for the wireless feature to be enabled.
5.Startup the IDS application.
6.If this is the first time IDS has been started, you will be prompted for preferences and settings. You may also be prompted for a license key or to validate your IDS license. For more details on IDS licensing, see the IDS Users Manual.
7.If a VCM II software update is available, you will be prompted to connect the VCM II USB cable to perform the update.
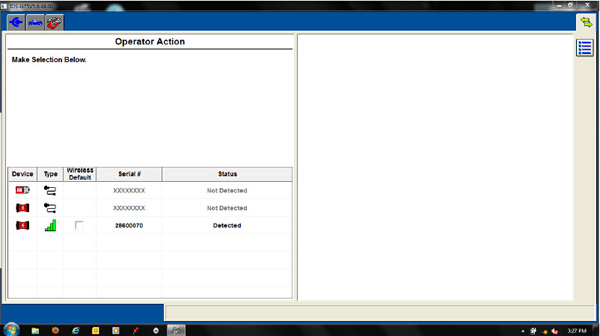
8.Click on the “Device Selection” tab
located at the top right corner of the IDS screen (see Figure 1: Device Selection Screen).
If the “Device Selection” tab is not visible, connect the VCM II to the computer using the USB cable.
9.Select the VCM II that you would like to connect to.
WARNING: Verify the VCM II serial number belongs to your device. Failure to do so may disrupt other VCM II’s and risk personal injury.
10.Check the “Wireless Default” box to make this VCM II your default. By specifying a default, you will no longer need to visit to this screen unless you want to connect to a different VCM II.
11.The VCM II is ready to operate with IDS wirelessly.
Now you have VCM II with D-Link adapter for wireless diagnostic as VCM II SP177-C1 WiFi version.

Leave a Reply